Sam's is your source for Hatteras and Cabo Yacht parts.

Enter a part description OR part number to search the Hatteras/Cabo parts catalog:

Email Sam's or call 1-800-678-9230 to order parts.

Bedding Window Frames with Butyl Tape and Sealant

  • Thread starter Thread starter Vincentc
  • Start date Start date
  • Replies Replies 13
  • Views Views 30,520

Vincentc

Legendary Member
Joined
Jun 3, 2008
Messages
1,514
Status
  1. OWNER - I own a Hatteras Yacht
Hatteras Model
43' DOUBLE CABIN (1970 - 1984)
I reworked and rebedded the port side cabin windows with boatlife polysulfide sealant shortly after we got the boat and within no time I had small leaks between the aluminum frame and the cabin side.

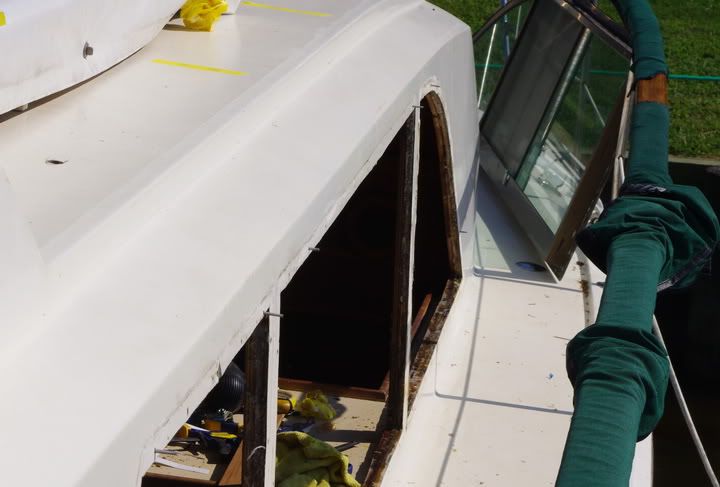
Once the rain stopped after TS Lee I removed the windows, old caulk and set out to remove and epoxy the rotten coring on the stb side windows, which I did not get to last time. A PO had apparently bedded the stb window frames with silicone caulk/sealant but did nothing for the coring.

I struggled with the quandray of sealant choices and searched the forum and other internet sites. My review of process recommended by Sams for glazing the fixed windows got me thinking about adapting its use of buty tape to my project. I also found this site and comments on Butyl tape interesting:
http://www.pbase.com/mainecruising/rebedding_hardware

I decided to use butyl tape to bed the aluminum window frames coupled with sealant out of the caulking gun. The tape does not easily compress and should allow a thick and consistent bead of sealant around the outer edge of the frame.

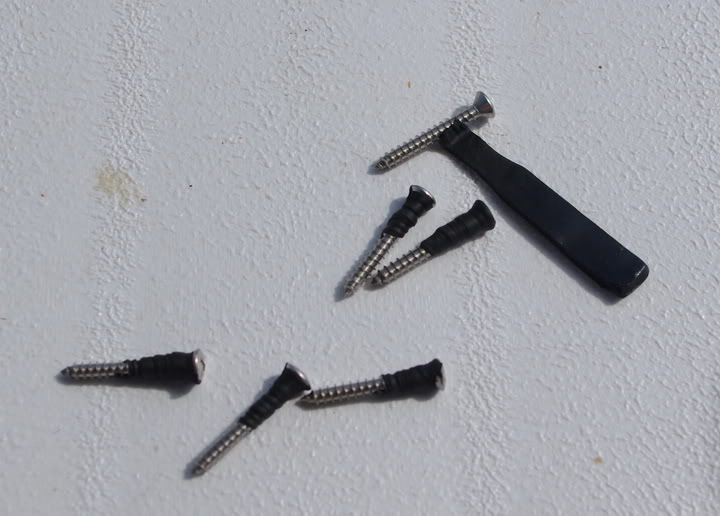
I am also going to bed the stainless screw heads with butyl to seal them and insulate the aluminum from the stainless.

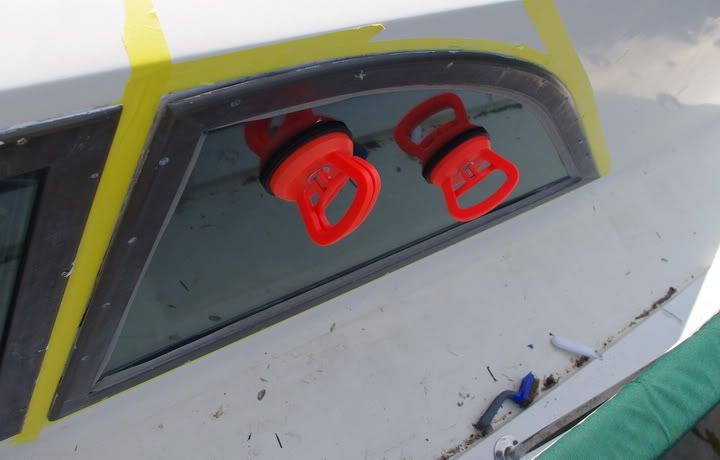
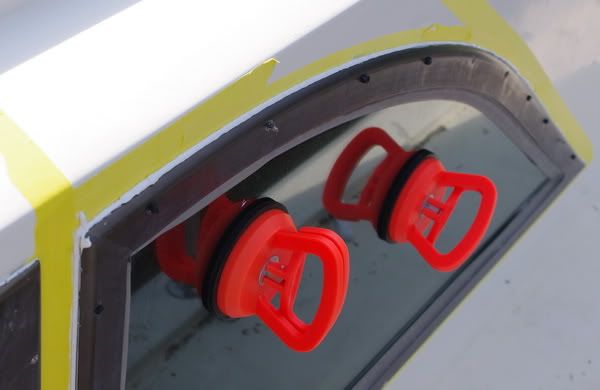
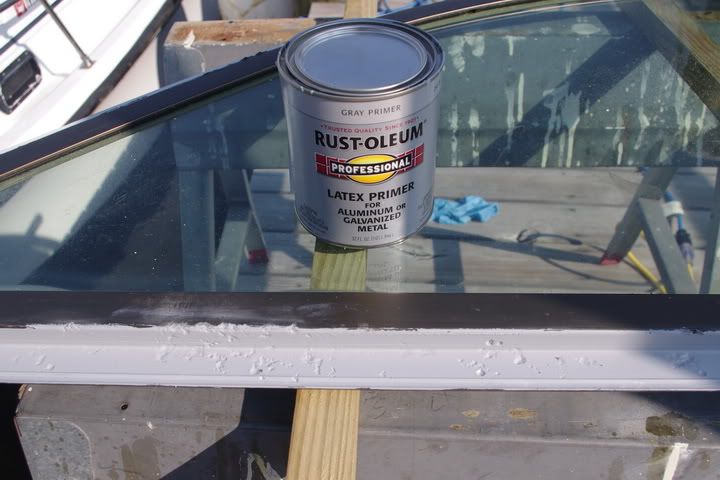
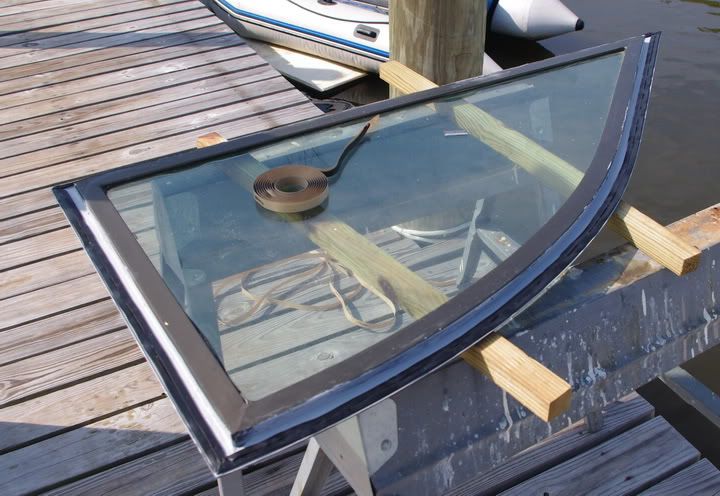
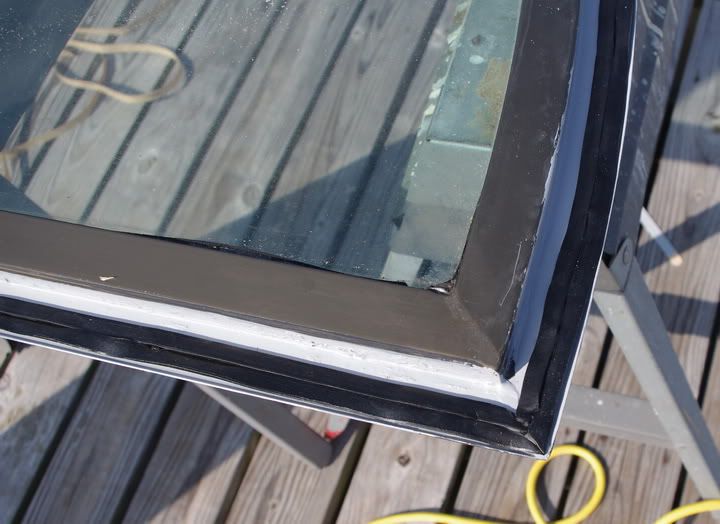
I purchased some 1/8 x 3/8" butyl tape from a glass company and am running the tape around the perimeter of the window frame leaving a 1/4" gap from the outside edge. After applying the buty tape to the aluminum frame I ran a thick bead of 3M 4200 around the outside perimeter of the port window frame. I plan on using RTV Silicone on the stb side since silicone was previously applied there. I was impressed with how well the silicone still stuck to the aluminum and fg.

I installed one port frame last night and hope to get the rest rebedded tonight.

I'll let you know how it works and may remember to take some pictures tonight.

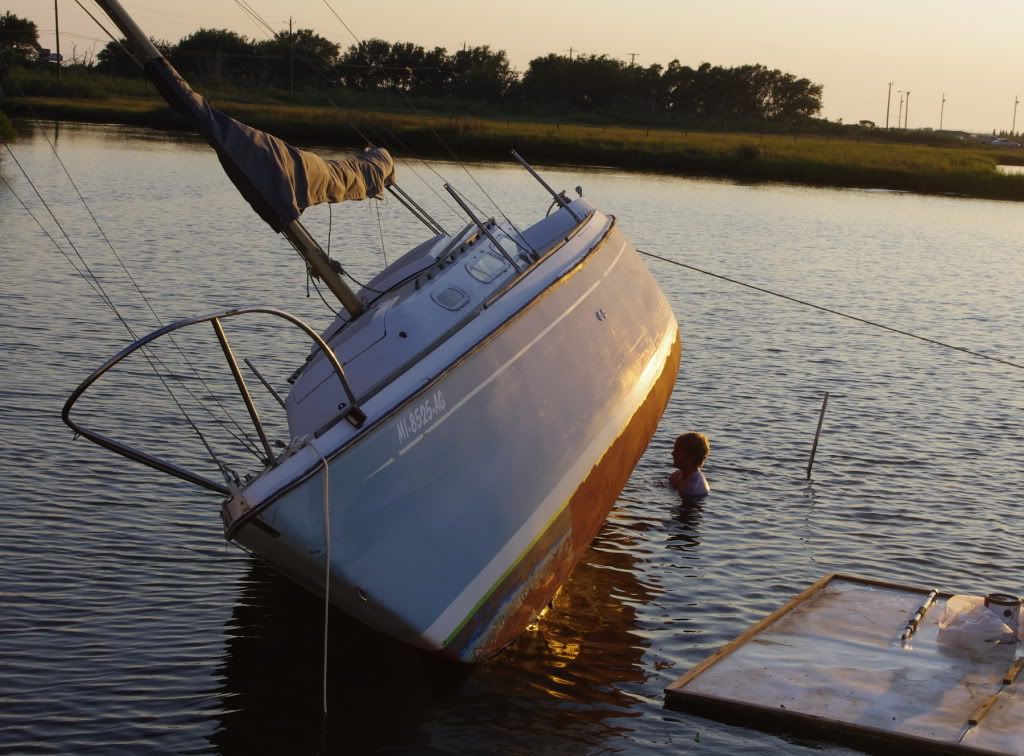
While I am working on the windows, my son is painting the bottom of the Oday without a haulout. I did get a picture of that.

IMGP5918r.jpg


Regards,
Vincent
 
Thank You for sharing - very interesting link you posted about butyl tape. My 1971 30' Bristol sailboat I sold my brother had thru deck fittings with butyl (assume original) that is still holding up very well. Looking forward to pictures :) and what others have to say about it. I'm coming out early (this weekend) to replace rotten deck core on port bow and repair and re-bed all my salon window frames. Gonna follow your lead on this one.
 
I had a 10,000' metal building built about 20 years ago. They used the butyl tape all over the building including the roof panel seams. never had a leak in the areas where they used the butyl. I ended up with the typical box of extra stuff and had boxes of the butyl tape. I used it for years for all kinds of things but never thouht about using it as a beding compound untill I went to SAMS and got the materials to rebed my front windows. I fish the boat hard and and have been breaking windows since I stepped on the boat 35 years ago. I've tried all kinds of caulk and bedding ideas over the years but the butyl is working the best. I've never been able to tell if the broken windows is from the flexing or movement in the frame but the ones I did with the SAMS method are good after 6 years. I dont know how efective it is but when I buy the window glass I pay the extra to have the edges polished to relieve the stress points from cutting.
I've thought about glassing in the front windows but when we are just hanging out in the Bahamas its nice to open things up and see whats going on around you. I've never understood people who get on a boat and close all the curtains.
 
At this point I've rebedded 4 cabin window frames and can share the following:

Removing is a challenge. The frames were too tight against the cabin for the multitool blade. I used 2 wood chisels and a rubber hammer. I started at one corner and gradually worked my way around the frame. You have to be careful not to bend the frame.

Creating mounting studs by putting a couple of long screws in the top row of screw holes near the corners and cutting off the heads with a metal cutting angle grinder blade is a big help, and will also put a lot of tears in your pants.

IMGP5949r.jpg


Masking tape on the cabin around the perimeter of the frame allows you put in sealant without a lot of clean up. The day after the install when the sealant is cured but still green, I ran a blade around the window frame then removed the tape leaving a pretty neat look. Suction cup handles are a big help handling the glass. The studs hold the frame in place and the butyl tape holds the frame out from the cabin side leaving space for the sealant caulk.

IMGP5964R.jpg


I can then run a bead of 4200 around the top and side of the windows, then snug it up with screws wrapped in butyl tape. When the screws are tightend up the buty squeezes out around the screw head. The photos shows the butyl excess which is easily pinched off. One of the alignment studs is also visible. A pair of vice grips allowed removal of the studs.

IMGP5980R.jpg


This is how I wrapped the screws with butyl.
Please excuse the phillips heads. I did not have square drive in the length I wanted. The old screws and holes did not hold well when I cranked down on them with the cordless drill driver. I drilled out the holes, all the way through then squirted in some West Six-10 filling the holes and after that cured, drilled the pilot holes. (Six-10 is a great tool. It allows you to shoot premixed thickened epoxy gel into holes with ease.) #8 x 1 1/4" screws are a bit longer than the OEM and worked fine.

IMGP5967R.jpg


Regards,
Vincent
 
Last edited:
More photos and Comments. You are only allowed 4 photos per post.

The frames had some significant corrosion. I wonder if the silicone sealant used when they were last rebedded, added to the corrosion. The stb side frames were more corroded than the port side. I used a wire wheel on a drill to remove the corrosion. The frames were also sanded, wiped with a caulk remover, then MEK and then denatured alcohol. I discoved and used this latex primer for aluminum at Lowes.

IMGP5952R.jpg


Here is the stb fwd window with 2 rows of 3/8" x 1/8" butyl tape. On earlier window rebeding I used only one line of butyl tape and applied the 4200 in a thicker bead to the frame before setting it in place. On this window I applied the sealant after mounting the window and before screwing it snug against the cabin side. This way avoids the mess of handling the frame with wet sealant but does not allow you to apply sealant to the bottom side of the frame, since there is not room for a caulk gun there.

IMGP5959R.jpg


IMGP5961R.jpg


Regards,
Vincent
 
Great thread ... thanks for the photos!
 
Good info/nice pics. I discovered the hard way (as you have) a while back that Boatlife caulk is useless and, IMO, should not be carried/used on a boat. It failed (leaked and/or cracked) in every application I used it for. I use one of the 3M products depending on what I'm doing.
 
Thank you, Vincent. There are a few threads like these that I file away under the "Hatteras Gods" folder and this will be one of them. The fact that you added a lot of very helpful photos helped me to completely understand what you were talking about, and I didn't have to try to use my imagination so much to comprehend it. I am anxious to do the windows in my raised cabin section on the bow, both of which do leak, this winter and I feel a lot less scared of the job now because I have a much better understanding of how to do it and what to expect. Thank you.

By the way, where did you find those glass grabber handles? I can't find them any any of the Home Depot type places.
 
Last edited:
Your are welcome.

The suction handles came from Amazon.com.

Regards,
Vincent
 
Ace Hardware had them in Cape Coral.
 
Like looking into the eyes of the beast - Thank You for post and pictures! This just took the 'oh the boy what the hell am I getting into' feeling down a notch.
 
Amen! This is an outstanding and timely thread. My windows have gone from being a mild nuisance to a real PITA. I will be addressing them in the spring.

Perhaps the Mods might consider moving this thread to the locked Frequently Asked Questions forum to keep it for posterity.
 
We just did a pop reseat of the forward center window of our '85 43 M/Y so we could remove and install a new refrigerator.

I will say, using 3M blue tape around the perimeter of the window BEFORE you remove it is a very good thing. The reason being quite a bit of the old adhesive is black and stringy. When you pull out the fine thickness putty knife the strings wind up on the tape instead of the surrounding paint. Peel up the tape and quite a bit of the clean up after installation goes with it.

Cleaning up the window frame and opening was best done with a flat blade prior to using any agents. Use a terry rag (buy them buy the sack full) and keep one handy to remove the goo. Once the area is relatively clear, use GOO GONE. The chit liquified the old stuff very well. As well the Acetone replacement (ethyl lactate) did a very good job of removing the old sealant.

Prior to applying any new tape or sealant, a good washing with soap and water to remove the agents left things in very good condition to install.

We used 1/8 x 3/4 butyl over the screw holes to about 1/8 of an inch of the outer limit of the frame. Then we ran two beads of Sikaflex 291 around the inside, dropped it in, and put a shot of the Sikaflex in each screw hole.

Time will tell, but it rained hard just as we finished and there were no leaks!

20150722_122429.webp
 
Just for some more info on Butyl tape. I talked to somebody that said they had trouble with Butyl tape,but they thought it may have been crappy quality butyl.

Anyway, earlier in this thread the guy was mentioned and his site. Supposedly he has come up with his on historically correct formulation and sells it.

About Bed-it Marine Sealant Tape:

After hundreds of requests for a high quality marine grade butyl tape I finally, through months and months of testing, developed a tremendous formulation. Due to EPA regulations the good stuff from 30-40 years ago is long gone. To try and find a tape, to survive the long term in the marine environment, was not an easy task so I had to develop my own formulation. After months and months going back and forth with my lab we finally landed on one. Bed-It Tape is gray in color, 1/16" thick and 1/2" wide and comes in a 50' roll. It is the perfect consistency & width for bedding deck hardware.

This is not what you'll get from an RV supplier at all. Thanks to my lab I was able to test and specifically tailor the formulation for a marine deck hardware application.

All the proceeds from the sale of Bed-It Tape get rolled back into the free "How To" articles posted on this site.
http://www.pbase.com/mainecruising/rebedding_hardware&page=3
 

Forum statistics

Threads
38,133
Messages
448,527
Members
12,481
Latest member
mrich1

Latest Posts

Trending content

Back
Top Bottom